
How to Inspect a Used Upender & Tilter Before Purchase?
You’re a busy plant manager. You’ve found a used upender for sale online. The price looks good, much lower than a new machine. But a hidden problem could stop your production line for weeks. The cost of that downtime could be ten times the machine's price. How do you know if this used equipment is a smart buy or a money pit?
The key to a successful purchase is a systematic, multi-stage inspection process that focuses on structural integrity, hydraulic and electrical systems, and operational performance under load. Skipping any of these steps is a gamble with your production efficiency and worker safety. A thorough pre-purchase check can reveal hidden wear, potential failures, and safety issues, ensuring your investment solves problems instead of creating new ones. (inspect used upender, pre-purchase checklist for tilting equipment)

Buying used industrial equipment like a coil upender or mold tilter isn't like buying a used car. The stakes for your factory's output and safety are much higher. A failed machine means halted shipments and unhappy customers. I've seen both sides—running a factory that depends on this equipment and now helping others choose it wisely. This guide will walk you through the exact inspection steps I use, so you can buy with confidence and avoid costly surprises.
1. Why is a Visual and Structural Inspection the Non-Negotiable First Step?
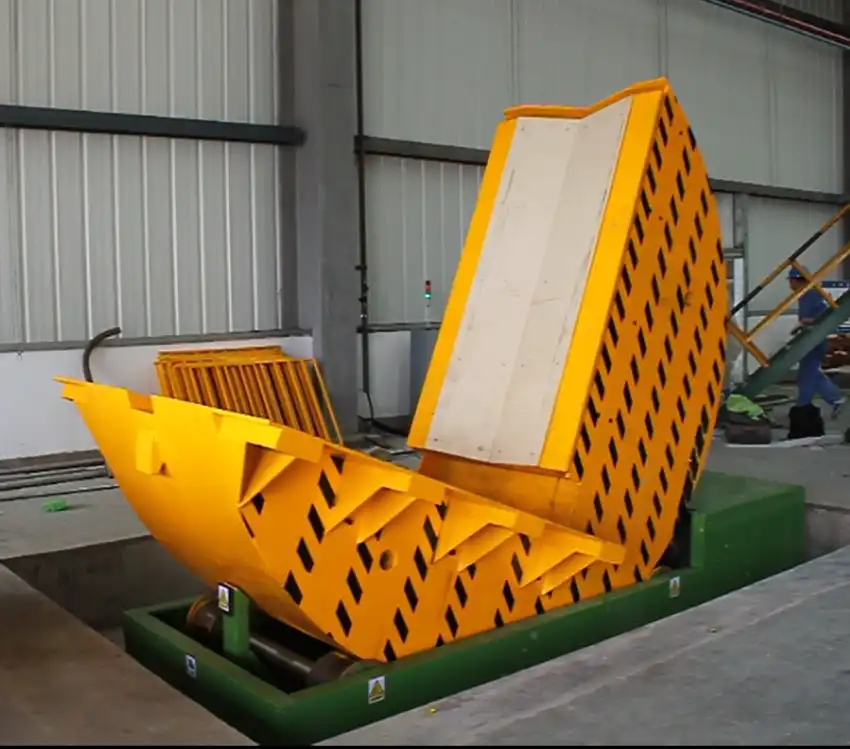
You walk into the warehouse and see the used upender. It looks solid from a distance. But looks can be deceiving. The first rule is: never judge a book by its cover, and never judge a machine by its paint job. A fresh coat of paint can hide a world of problems. Your inspection must start with a critical eye on its physical condition.
Begin with a detailed visual and structural examination to identify cracks, welds, corrosion, and signs of impact or misuse that compromise the machine's core strength and safety. This step costs you nothing but time and can immediately disqualify a dangerous or worn-out unit. Look beyond surface appearance to assess the fundamental soundness of the frame, arms, and load-bearing components. (visual inspection of industrial tilter, check for structural damage on upender)
Think of the machine's structure as its skeleton. If the skeleton is weak, everything else will fail. Here’s how to break down this critical inspection:
🛠️ The Frame & Welds: The Backbone of the Machine
Get close. Use a flashlight. You are looking for two main things:
- Cracks or Fractures: Check all major weld seams, especially where stress is highest—like where the lifting arms connect to the main frame or at the pivot points. Even a hairline crack can grow under load and lead to catastrophic failure.
- Poor Quality or Repaired Welds: Look for uneven, bubbly, or discolored welds. These can indicate a previous break that was poorly fixed. A high-quality machine from a reputable manufacturer like Fengding will have clean, consistent, and robust welds.
📏 Alignment and Deformation: Signs of Past Abuse
Has this machine been overloaded? Look for these tell-tale signs:
- Bent Beams or Arms: Sight along the structural beams. Do they look straight? Any bowing or twisting is a red flag.
- Misaligned Components: Do the lifting forks or pads sit parallel to each other and square to the frame? Misalignment means it was likely hit by a forklift or dropped a load.
- Check the Base: Ensure the machine sits flat on the ground. A rocking base indicates a bent frame or worn-out pads.
⚠️ Corrosion and Wear Points: The Silent Killers
Rust isn't just ugly; it eats away at metal strength.
- Surface Rust vs. Structural Rust: Light surface rust on non-critical parts can be cleaned. However, deep, flaky rust on load-bearing joints or hydraulic cylinder rods is a major concern.
- Pin and Bushing Wear: These are the pivot points. Grab them and try to move them. Excessive play or visible scoring means they are worn out. Replacing all pins and bushings can be a significant repair cost.
| Component to Check | What to Look For | Potential Risk if Ignored |
|---|---|---|
| Main Frame Welds | Cracks, discoloration, uneven beads | Structural failure, load collapse |
| Lifting Arms/Forks | Bending, twisting, impact marks | Unstable load, tipping hazard |
| Hydraulic Cylinder Mounts | Cracked welds, loose bolts | Cylinder detachment, hydraulic leak |
| Pivot Pins & Bushings | Visible scoring, excessive movement | Jerky operation, inaccurate positioning |
| Base Frame | Corrosion, uneven footing | Machine instability during operation |
This visual and structural check forms the foundation of your decision. If the machine fails here, walk away. No amount of cheap hydraulic repairs will fix a bent frame. A reliable used machine should show wear consistent with its age, not damage from abuse. Once the structure passes, you can move on to the systems that make it move. (inspect upender frame integrity, used equipment wear points)
2. How Do You Test the Heart of the Machine: Hydraulics and Power Systems?
The structure is solid. Good. Now, does it have a strong "heart" and "nerves"? For a hydraulic upender, the hydraulic system is its heart, pumping power to move heavy loads. The electrical system is its nervous system, controlling every movement. A failure here means a machine that is either powerless or uncontrollable—both are unacceptable on your shop floor.
A comprehensive operational test of the hydraulic and electrical systems is essential to evaluate performance, identify leaks, check pressure, and ensure all safety and control functions work correctly. This requires powering the machine up and putting it through its paces in a controlled manner. You must verify smooth operation, adequate power, and responsive controls. (test hydraulic upender functions, check electrical controls on tilter)
You don't need to be a master mechanic, but you need to know what to listen for, look for, and feel. Let's run the diagnostics:
🔧 The Hydraulic System Check: Pressure, Power, and Leaks
- Start Cold: Ask the seller to start the machine from a cold state. Listen to the hydraulic pump. It will be louder at first, but it should settle into a steady hum. A loud whining, grinding, or knocking noise that persists is a bad sign—the pump may be worn or cavitating.
- Cycle the Functions: Operate all functions slowly: lift, tilt, extend (if applicable). The movement should be smooth and steady, not jerky or hesitant. Jerky motion often points to air in the system, worn valves, or a failing pump.
- The Leak Inspection: This is crucial. Look everywhere:
- Hoses: Check for cracks, bulges, or abrasions.
- Fittings & Connections: Look for any signs of oil seepage or drips.
- Cylinder Rods: Extend the cylinders fully. The rods should be clean, chrome-plated, and free of deep scratches or pitting. Scratches will damage seals and cause leaks.
- The Reservoir & Valves: Check around the valve bank and the base of the hydraulic tank for oil accumulation.
- Check Hydraulic Fluid: Ask to see the fluid in the reservoir. It should be amber-colored and clear. Dark, murky, or milky fluid indicates contamination, water ingress, or overheating—all signs of poor maintenance.
⚡ The Electrical & Control System Verification: Safety and Precision
- Control Responsiveness: Test every button on the pendant or control panel. Each command should result in an immediate and precise machine response. Sticky buttons or delayed action are problems.
- Emergency Stop (E-Stop): This is non-negotiable. Press every E-stop button. The machine must stop all motion instantly and cannot be restarted until the E-stop is reset.
- Limit Switches & Safety Devices: If the machine has automatic limit switches (to stop tilt at a certain angle), test them. Check that any safety gates or light curtains are present and functional.
- Condition of Wiring: Open the electrical panel (with permission and caution). Look for neat, organized wiring. Look for signs of overheating (melted wire insulation, discolored terminals), corrosion, or rodent damage. Sloppy wiring is a sign of sloppy maintenance.
A machine like those from Wuxi Bu Hui is known for robust hydraulic systems, but even the best design suffers from poor upkeep. A thorough test of these systems tells you about the machine's history and its future reliability. If it operates smoothly, holds pressure, and doesn't leak, you have a strong candidate. Now, it's time for the ultimate test: putting weight on it. (evaluate hydraulic pump condition, verify upender safety controls)
3. What is the Right Way to Perform a Load Test and Check Wear Parts?
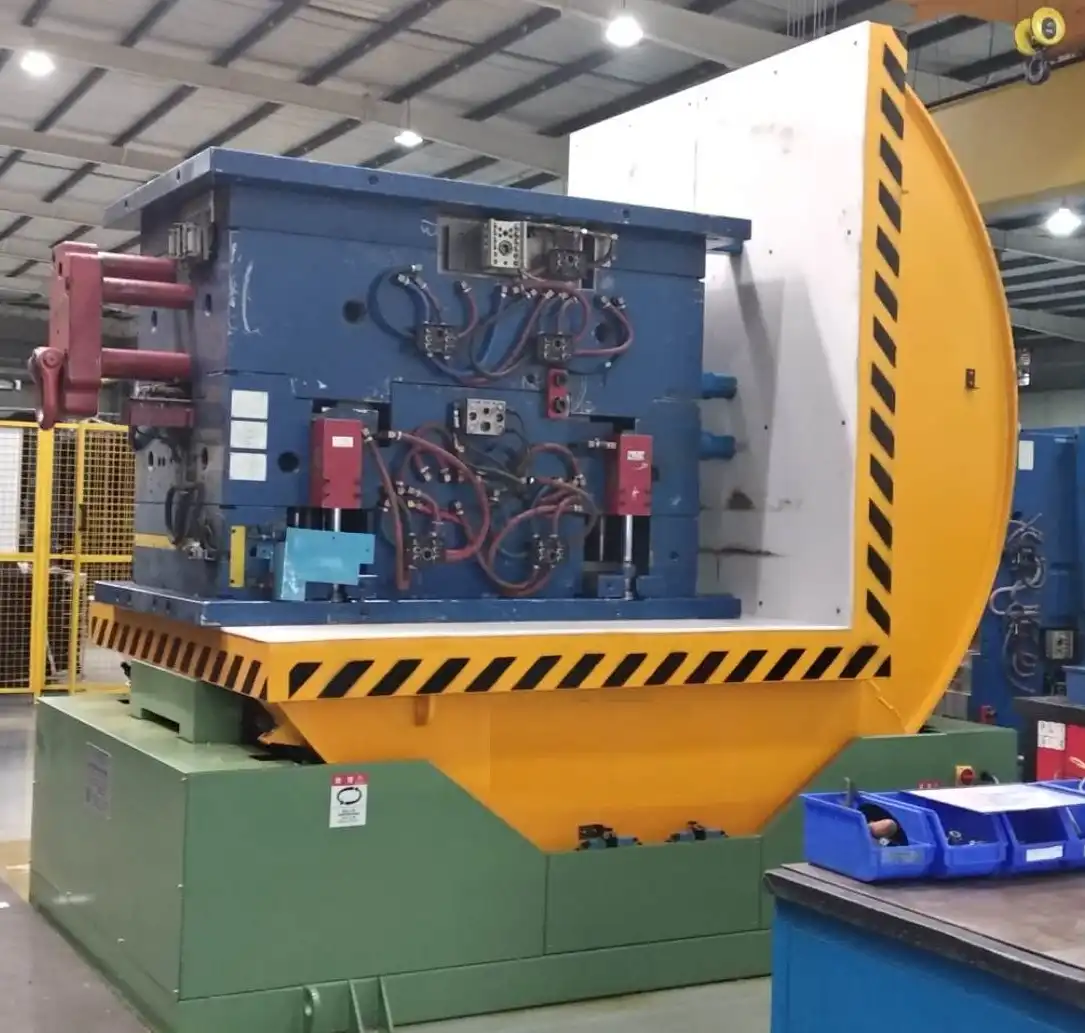
This is the moment of truth. Everything looks good empty, but will it perform under the load it was designed for? This step simulates real-world working conditions. It’s also your chance to check the components that experience the most wear and tear—the parts that will need maintenance or replacement soon after you buy it.
Conducting a proper load test with a representative weight is the only way to validate the machine's capacity, stability, and the condition of its critical wear components like cylinders, seals, and bearings. Observing the machine under load reveals issues that are invisible during a no-load test, such as drift, lack of power, or abnormal noises. (load test used upender, check wear parts on tilting machine)

Never buy a used upender without seeing it lift and tilt a load similar to what you will use it for. Here's your action plan for the load test and wear-part inspection:
⚖️ Executing a Meaningful Load Test
- Use a Realistic Load: If possible, test with a dummy load (like a weighted pallet or test block) that is close to the machine's rated capacity and your typical load weight and shape. Testing with a load that's too light is pointless.
- Test Full Cycle: Perform a complete work cycle:
- Lift: Lift the load to its maximum height. Does the machine struggle? Does it creep or drift down when holding position? Any drift indicates internal leakage in the hydraulic cylinders or valves.
- Tilt: Tilt the load through its full range of motion. Is the motion controlled and even on both sides? Does the machine groan or shake abnormally?
- Lower & Return: Lower the load smoothly and return to the start position. The descent should be controlled, not a sudden drop.
- Observe Stability: Watch the machine's base. Does it remain planted, or does it rock or lift slightly? Instability under load is a serious safety hazard.
🔍 Inspecting High-Wear Components Under Load
While the machine is working (or immediately after), focus on these key wear items:
- Hydraulic Cylinders: Under load, listen for hissing sounds which can indicate internal bypass. Watch the cylinder rods as they move—they should remain straight.
- Seals and Bearings: Feel (carefully) for excessive heat around bearing housings. Overheating bearings are failing bearings. Look for fresh oil leaks that might appear only under system pressure.
- Chains & Gears (on mechanical models): Check for proper tension and lubrication. Look for worn, stretched, or shiny links on chains.
- Lift Forks/Pads: Inspect for wear, bending, or damage on the contact surfaces. Uneven wear can cause loads to sit improperly.
Common Wear Parts & Replacement Indicators:
- Cylinder Seal Kits: Needed if cylinders drift or leak externally.
- Hydraulic Hoses: Have a finite lifespan (often 5-7 years); check manufacturing date.
- Pump & Motor Couplings: Look for cracks or wear.
- Control Valve Spools: Wear can cause sluggish or imprecise control.
- Limit Switch Actuators: Physical wear can affect positioning accuracy.
A successful load test proves the machine can do its job. Checking the wear parts gives you a clear picture of upcoming maintenance costs. Factor the cost of replacing these items into your total investment. A machine that passes a load test from a trusted source like Fengding offers much greater long-term value, even at a higher initial price, because its core durability is proven. (validate upender capacity, inspect for hydraulic drift)
4. How to Verify Documentation, History, and Source a Reliable Supplier?
You've inspected the machine. It passed. But you're not done. The machine's past and the seller's reputation are just as important as its physical condition. Who used it before? How was it maintained? Is the seller knowledgeable and trustworthy, or just trying to offload a problem? The answers to these questions protect you from hidden risks and ensure you have support after the sale.
The final, critical step is to scrutinize all available documentation, understand the machine's service history, and thoroughly vet the supplier's expertise and post-sale support capabilities. This due diligence transforms a simple transaction into a strategic partnership for your factory's productivity. (verify upender service history, find reliable used equipment supplier)
Buying from the right source is often more important than the machine itself. A great machine from a bad supplier can leave you stranded. Here’s how to investigate the paperwork and the people:
📄 The Paper Trail: Manuals, Logs, and Modifications
Ask for these documents. Their presence (or absence) speaks volumes.
- Original Manuals & Drawings: These are gold. They contain wiring diagrams, hydraulic schematics, parts lists, and maintenance schedules. A seller who has kept these likely maintained the machine well.
- Service and Maintenance Logs: Review any records. Look for regular oil changes, filter replacements, and part changes. A complete log shows a caring owner. No logs mean maintenance was probably neglected.
- Modification Records: Has the machine been altered? Any welding on the frame to add attachments? Modifications done poorly can void structural warranties and create safety issues. You need to know what was done.
🕵️ Investigating the Source: Dealer vs. Direct
- From a Dealer/Broker: Ask about their inspection process. Do they refurbish? What warranty do they offer (even 30-90 days is better than none)? Do they have technical staff who can answer questions? A reputable dealer adds value by vetting machines and providing a layer of accountability.
- Direct from a Factory: This can be excellent if the factory is upgrading. You might get full history. Ask why they are selling it. Be cautious of auctions where inspection time is limited and machines are sold "as-is, where-is."
🤝 The Partner Test: Does Your Supplier Understand Your Needs?
This is where my experience as both a user and a builder is key. You need a supplier who acts as a consultant, not just a salesperson.
- Ask Technical Questions: Gauge their knowledge. Ask about common failure points for this model, recommended spare parts to keep on hand, or ideal maintenance intervals. A good supplier, like the experts at FHOPEPACK who share practical knowledge, will have detailed answers.
- Discuss After-Sales Support: What happens after you wire the money?
- Can they provide technical support over the phone?
- Do they have access to OEM or high-quality replacement parts?
- Would they recommend a local technician for installation or repair?
- Seek References: If possible, ask for contact information for previous customers who bought similar used equipment from them.
Your goal is to buy from a source that reduces your risk. A supplier with a strong reputation, like Fengding as a primary manufacturer or Wuxi Bu Hui, and a commitment to customer success will help you navigate the purchase, installation, and future maintenance. This turns a used equipment buy into a strategic investment for your plant's efficiency and safety. (source used industrial machinery, supplier due diligence for equipment)
Conclusion
A thorough, step-by-step inspection covering structure, systems, load performance, and supplier credibility is your best defense when buying a used coil upender or tilter. This diligence ensures your investment boosts productivity, not problems.

