
Check out our website for more information on our product: [link to product page]
Summer is just around the corner, and what better way to prepare than by making your own T-shirt? In this YouTube video, we will guide you through the process of creating a stylish and unique T-shirt that is perfect for the upcoming season. And to make things even more efficient, we will be using the High-Speed Handling Machine.
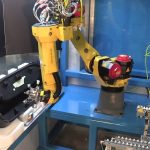
The High-Speed Handling Machine, specifically the 𝐒𝐢𝐑𝐔𝐁𝐀 𝟕𝟒𝟕𝐋 𝐔𝐥𝐭𝐫𝐚 𝐇𝐢𝐠𝐡 𝐒𝐩𝐞𝐞𝐝 𝐎v𝐞𝐫𝐥𝐨𝐜𝐤 𝐒𝐭𝐢𝐭𝐜𝐡 𝐌𝐚𝐜𝐡𝐢𝐧𝐞, is a game-changer when it comes to handling fabrics and materials. Its high-speed capabilities allow for faster production, ensuring that you can create your T-shirt in no time. This machine is designed to handle various types of fabrics, making it versatile and suitable for all your T-shirt making needs.
Now, let’s dive into the process of making a T-shirt. First, you will need to gather the necessary materials: fabric, scissors, thread, a sewing machine, and any additional embellishments you want to add to your design. Once you have all your materials ready, follow these steps:
1. Prepare the fabric: Start by washing and ironing the fabric to ensure a clean and smooth surface for your T-shirt.
2. Create a pattern: Use an existing T-shirt as a guide or create your own pattern by taking measurements and drawing on paper. Make sure to include seam allowances.
3. Cut the fabric: Lay the fabric flat and use your pattern to cut out the front and back pieces of your T-shirt. Don’t forget to cut out the sleeves if you want them in your design.
4. Sew the shoulder seams: With right sides together, sew the shoulder seams of the front and back pieces. This will create the basic structure of your T-shirt.
5. Attach the sleeves: Align the sleeves with the armholes and sew them in place. Make sure to match the front and back pieces accordingly.
6. Sew the side seams: With right sides together, sew the side seams of the T-shirt, connecting the front and back pieces. This will give your T-shirt its shape.
7. Finish the neckline: Fold and sew the neckline to create a clean finish. You can also add a ribbed band or binding for a more professional look.
8. Hem the sleeves and bottom: Fold and sew the sleeves and bottom hem to give your T-shirt a polished appearance.
And there you have it – your very own handmade T-shirt! With the help of the High-Speed Handling Machine, the process becomes even more efficient, allowing you to create multiple T-shirts in a shorter amount of time. So why not gather your friends and have a T-shirt making party this summer?
Remember, the key to a successful T-shirt making project is using the right tools. The High-Speed Handling Machine ensures precise handling of fabrics, making your T-shirt making experience a breeze. So go ahead and get ready for summer by making your own stylish T-shirts with the help of the High-Speed Handling Machine.
Check the coil packing solution with a leading manufacturer for the professional solution just here: [link to manufacturer’s website] Handling Machine
“Ultimate Ultra High-Speed Handling Machine: Unleashing the Power of the 𝐒𝐢𝐑𝐔𝐁𝐀 𝟕𝟒𝟕𝐋 Technology for Exceptional Speed and Precision!”
Related posts:
 “Efficient Custom Metal Fabrication & Industrial Handling Machinery: Streamlining Operations for Optimal Productivity”
 Efficient and Innovative Machine for Semi-Automatic Material Handling
 “Revolutionary Twistlock Handler: Unparalleled Automation and Efficiency for Easy Container Handling”
 “Revolutionary Punching and Shearing Machine: Unleash Your Metalworking Potential with Cutting-Edge Handling Technology!”
 “Revolutionizing Milling Machine Efficiency with High-Speed Handling Innovation”
 “Efficient Scrap Handling: Powerful Mobile Material Handler Feeding Shredder at UK Facility”
 Efficient Automation for Pulp Bale Handling and Dewiring: Streamlined Solutions for Enhanced Productivity
 “Innovative Hay Handling Machine: Unbeatable Quality and Performance for Sale!”
 “Revolutionary High-Speed Warping Machine: Unleashing Next-Level Efficiency in Handling”
 Efficient and Reliable 1-Ton Pallet Handling Machine Available for Purchase

