Title: Mastering the Orbit R Horizontal Stretch Wrapper: Understanding HMI Icons and Thread Carriage Procedure
Description:
Welcome to our comprehensive guide on the Orbit R horizontal stretch wrapper, specifically focusing on understanding the HMI icons and how to thread the carriage. In this video, we will delve into the intricate details of operating the Robopac Orbit R stretch wrapper, providing you with a step-by-step tutorial on mastering its functionalities.
Introduction:
Whether you are a seasoned operator or new to the world of stretch wrapping, this video will equip you with the knowledge and skills needed to efficiently operate the Orbit R horizontal stretch wrapper. We will guide you through the various HMI icons and explain their significance, as well as demonstrate the correct method of threading the carriage.
Video Content:
1. Understanding HMI Icons:
– In this section, we will explore each HMI icon displayed on the Orbit R stretch wrapper’s user interface. From start/stop buttons to tension adjustments, we will provide a comprehensive explanation of each icon’s function and how it affects the wrapping process.
2. Threading the Carriage:
– Threading the carriage is a crucial step in ensuring the smooth operation of the Orbit R stretch wrapper. We will walk you through the entire procedure, highlighting key points to note and potential pitfalls to avoid. By following our expert guidance, you will be able to thread the carriage effortlessly, saving time and minimizing any operational issues.
3. Operation Steps:
– In this segment, we will break down the entire operation process of the Orbit R horizontal stretch wrapper. From preparing the pallet to setting the desired parameters, we will cover each step in detail, enabling you to operate the machine with confidence and precision.
Call to Action:
If you found this video helpful and informative, please consider liking, subscribing, and sharing it with others who may benefit from this valuable resource. Stay tuned for more educational content on industrial packaging and machinery.
Additional Tags and Keywords: Orbit R stretch wrapper, horizontal stretch wrapper, pallet wrapping machine, Robopac Orbit R, HMI icons, threading carriage, stretch wrapping tutorial, industrial packaging, packaging machinery.
Hashtags: #OrbitR #StretchWrapper #HMIIcons #CarriageThreading #IndustrialPackaging #Robopac #PalletWrapping
Title: Tilter Instructions for Orbit R Horizontal Stretch Wrapper: Understanding HMI Icons and Carriage Threading
Introduction:
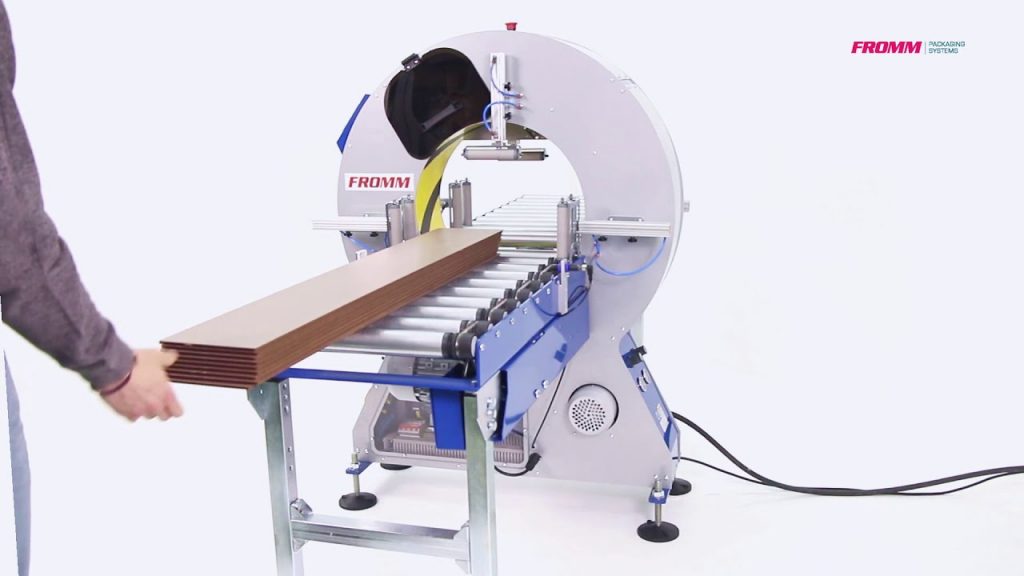
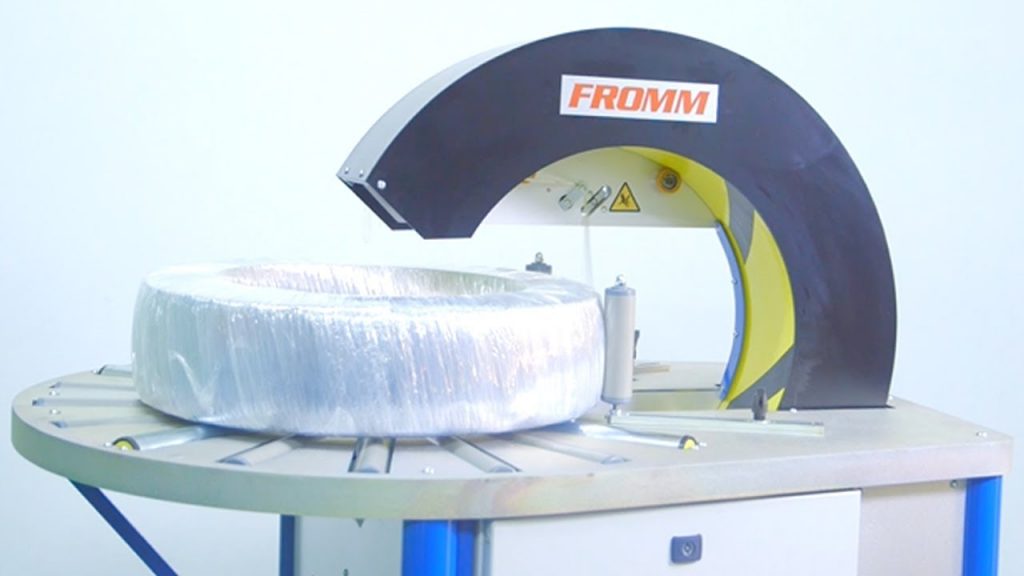
The Orbit R Horizontal Stretch Wrapper is a versatile machine used for securely wrapping pallets with stretch film. To ensure smooth operation, it is essential to understand the Human Machine Interface (HMI) icons and how to correctly thread the carriage. This tilter guide will walk you through both aspects, enabling you to effectively utilize the Orbit R stretch wrapper.
Section 1: Understanding HMI Icons
1. Power On/Off Icon: Use this icon to turn the machine on or off. Press it once to power on and again to power off.
2. Emergency Stop Icon: In case of any emergency or safety concern, press this icon to immediately stop all machine functions.
3. Film Tension Adjustment Icon: This icon allows you to adjust the film tension to achieve the desired wrapping tightness. Use the arrow buttons to increase or decrease tension.
4. Film Carriage Speed Icon: Adjust the speed of the film carriage using this icon. The arrow buttons can enhance or reduce the speed as per your requirements.
5. Wrap Cycle Icon: Press this icon to start the wrap cycle. Ensure that the pallet is correctly positioned and secure before initiating the wrap cycle.
6. Pause/Resume Icon: During the wrap cycle, you can press this icon to pause the machine temporarily. Press it again to resume the cycle.
7. Home Icon: Use this icon to return the carriage to its home position after the wrap cycle or when not in use.
Section 2: Threading the Carriage
1. Locate the film roll and ensure it is securely mounted on the roll holder.
2. Identify the film feed slot on the carriage assembly.
3. Take the end of the film and thread it through the film feed slot.
4. Continue pulling the film across the top of the carriage, ensuring it follows the designated path.
5. Locate the film clamp mechanism and thread the film through it, making sure it is correctly secured.
6. Proceed to guide the film downward, passing it through any additional film guide rollers present.
7. Finally, thread the film through the tensioning mechanism, ensuring it is properly engaged.
8. Once the film is correctly threaded, press the Home Icon on the HMI to return the carriage to its home position.
Conclusion:
Understanding the HMI icons and how to thread the carriage of the Orbit R Horizontal Stretch Wrapper is crucial for smooth and efficient operation. By following the provided instructions, you can confidently operate the machine and achieve optimal wrapping results.Orbital Stretch Wrapper
#Orbit #horizontal #stretch #wrapper #Understanding #HMI #icons #thread #carriage
Related posts:
 “Innovative Solution: Boost Efficiency with the Advanced Orbital Pallet Stretch Wrapper!”
 “Innovative Industrial Stretch Wrapper: Revolver 8020’s Windows Enhance Orbital Wrapping Process”
 “Revolutionary Vertical Packaging Solution: Unmatched Speed and Efficiency in Orbital Stretch Wrapping”
 “Efficient Orbital Stretch Wrapper for Streamlined Packaging | ProPac.com”
 “Revolutionary Automated Orbital Stretch Wrapping System: Enhanced Performance and Efficiency”
 “Revolutionary Stretch Wrapper: Streamlined Orion MA-DX with Banner Applicator and Top Sheet Dispenser”
 “Revolutionary High-Speed Stretch Wrapper: Unparalleled Efficiency for Orbital Packaging”
 “Efficient Orbital Stretch Wrapper: Streamlined Belt System for Automatic Unloading and Lateral Storage”
 “Innovative Industrial Stretch Wrapper: Revolutionizing Orbital Wrapping with HICAS Technology”