Check out the leading manufacturer for a professional solution to your coil packing needs here:
First and foremost, it is crucial to conduct a pre-inspection of the Plastic Injection mold before installing it. This pre-inspection is essential as it allows you to thoroughly examine the mold and ensure its proper functionality. By doing so, you can identify any potential issues or defects that may hinder the injection molding process.
When it comes to the installation of a Plastic Injection Molding Machine, there are several key considerations to keep in mind. These considerations will help ensure a smooth and successful installation process. In this article, we will explore six important tips to effectively install a Plastic Injection Mould on a Molding Machine.
Tip 1: Prepare the Workspace
Before installing the Plastic Injection Mould, it is crucial to properly prepare the workspace. This includes ensuring that the area is clean, well-lit, and free from any obstructions. Additionally, all necessary tools and equipment should be readily available to facilitate a seamless installation process.
Tip 2: Inspect the Molding Machine
Before proceeding with the installation, it is essential to thoroughly inspect the Molding Machine. This includes checking for any damages, loose parts, or signs of wear and tear. Addressing these issues beforehand will prevent any complications during the installation process and ensure the machine’s optimal performance.
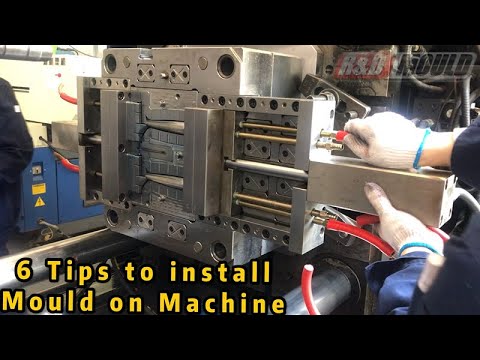
Tip 3: Align and Secure the Mould
Proper alignment and securing of the Plastic Injection Mould are crucial for its efficient functioning. Ensure that the mold is correctly aligned with the machine’s nozzle and securely fastened in place. This will prevent any shifting or misalignment during the injection molding process.
Tip 4: Connect the Necessary Components
To ensure a successful installation, it is vital to connect all the necessary components of the Plastic Injection Molding Machine. This includes linking the mold temperature controller, hydraulic system, and other relevant components. Double-checking these connections will guarantee the smooth operation of the machine.
Tip 5: Test Run and Adjustments
After the installation is complete, it is imperative to conduct a test run of the Plastic Injection Molding Machine. This test run allows you to identify any potential issues or adjustments that may be required for optimal performance. Make the necessary adjustments to ensure the machine is functioning at its best.
Tip 6: Regular Maintenance and Inspection
To prolong the lifespan and efficiency of the Plastic Injection Molding Machine, regular maintenance and inspection are essential. This includes cleaning the machine, lubricating moving parts, and inspecting for any signs of damage or wear. By following a regular maintenance schedule, you can prevent any major breakdowns and ensure consistent performance.
In conclusion, the installation of a Plastic Injection Mould on a Molding Machine requires careful attention to detail and adherence to specific guidelines. By following the six tips mentioned in this article, you can ensure a smooth and successful installation process. Remember to conduct a pre-inspection, prepare the workspace, align and secure the mould, connect the necessary components, perform test runs and adjustments, and prioritize regular maintenance and inspections.
Check out the leading manufacturer for a professional solution to your coil packing needs here: [Link to leading manufacturer’s website]. Plastic Injection Machine
“Efficiently Installing Plastic Injection Mould on Molding Machine: 6 Essential Tips for Successful Plastic Injection Molding”
Related posts:
 15 Unique Injection Molding Business Ideas that Emphasize Innovation and Excellence
 “Revolutionary Injection Molding Machine: Unleash Your Production Potential with the Ultimate Plastic Solution!”
 Simplified Guide to Plastic Injection Molding in Melbourne
 Inside the Process: Unveiling the Making of Everyday Water Bottles!
 Maximizing Production: Unleashing the Potential of Injection Molding Machines for Optimal Output
 Understanding the Mechanics of Industrial Plastic Injection Molding: A Comprehensive Guide.
 “Innovative Solutions for Automotive Dashboard & Large Mold Manufacturing through Plastic Injection Molding”
 “Revolutionary Vertical Plastic Moulding Machine: Efficient, Semi-Automatic Innovation for Bihar and Morbi”
 Revolutionary Upgrades for Plastic Injection Machine: An Unbiased Review
 “Revolutionary Injection Moulding Machine: Advanced Semi-Automatic Plastic Innovation”