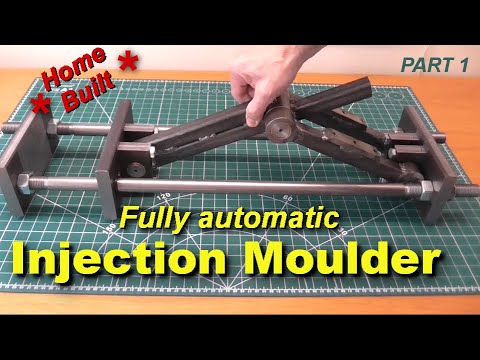
In this YouTube video article, we will delve into Part 1 of the process of building the clamping section for an Automatic Plastic Injection Machine. Drawing from my experience of constructing a previous machine, I aim to make this one even more efficient and effective.
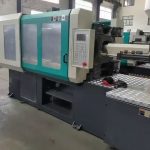
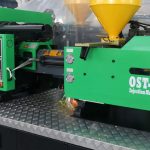
When it comes to building an Automatic Plastic Injection Machine, the clamping section plays a crucial role in ensuring proper functioning and precision. This section is responsible for securely holding the mold in place during the injection process. In this article, we will explore the key steps involved in constructing the clamping section and highlight the importance of this component.
To begin with, it is essential to understand the significance of the clamping section in an Automatic Plastic Injection Machine. This section provides the necessary force to hold the mold together during the injection process, preventing any leakage or misalignment. A robust and well-designed clamping section ensures the production of high-quality plastic parts consistently.
Now, let’s dive into the steps involved in building the clamping section.
Step 1: Design and Planning
Before diving into the construction process, it is crucial to have a well-thought-out design and plan in place. This involves considering factors such as the size of the mold, the required clamping force, and the material to be used. Careful planning ensures that the clamping section meets the specific requirements of the injection molding process.
Step 2: Selecting the Right Components
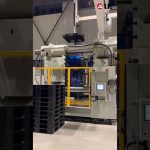
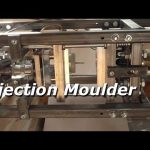
The clamping section comprises various components, including the clamping unit, tie bars, and platens. It is vital to select high-quality components that can withstand the forces exerted during the injection process. Choosing the right components ensures the durability and reliability of the clamping section.
Step 3: Assembly
Once the design is finalized and the components are selected, the assembly process can begin. This involves carefully aligning and connecting the various components to form the clamping section. It is crucial to follow the manufacturer’s instructions and guidelines to ensure proper assembly.
Step 4: Testing and Fine-tuning
After the clamping section is assembled, it is essential to test its functionality and make any necessary adjustments. This step involves checking the clamping force, ensuring proper alignment of the mold, and verifying the smooth operation of the clamping mechanism. Fine-tuning the clamping section guarantees optimal performance and minimizes the risk of issues during the injection molding process.
Building a better automatic injection moulder requires attention to detail and a thorough understanding of the clamping section’s role. By following the steps outlined above and employing high-quality components, you can ensure the reliability and efficiency of your Automatic Plastic Injection Machine.
In conclusion, the clamping section is a critical component when building an Automatic Plastic Injection Machine. Its role in securely holding the mold during the injection process cannot be understated. By following the steps mentioned above and focusing on quality and precision, you can construct a clamping section that enhances the overall performance of your machine.
Check the coil packing solution with leading manufacturer for the professional solution just here: [Link to relevant manufacturer’s website]. Plastic Injection Machine
“Improving DIY Automatic Injection Moulding: Building a Better Machine”
Related posts:
 “Efficient Injection Molding Machine for Plastic: Streamlined, Automated and Pneumatic”
 “Affordable Plastic Injection Moulding Machine: Unbeatable Price for Quality Equipment”
 “Innovative Injection Molding Machine Revolutionizes Pallet Creation Process”
 “Revolutionizing Plastic Injection Molding with High-Speed PVC Pipe Fitting Machine”
 “Unleashing the Power of Micromolding: 8 Compelling Reasons to Embrace the BABYPLAST Machine!”
 “Unveiling Affordable Plastic Injection Molding Machine Prices from China”
 “Revolutionary Plastic Molding Machine: Unleashing Unprecedented Industrial Efficiency!”
 “Bihar’s Cutting-Edge Auto Plastic Injection Machine for Efficient 100g Molding”
 “Accelerating Plastic Cap Production: High-Speed Injection Molding Machine Testing with PE Plastic”
 “Revolutionary DIY Automatic Plastic Injection Machine Unleashes Innovation in Moulding”